The Anatomy of an Artwork - The Serpent Rings
Share
The Anatomy of an Artwork - The Serpent Rings
People often ask me how I arrive at a finished colour artwork - is it done on computer (NO!); what paints do you use; do you work with an airbrush; and so on.
While I was working on Magnum's 'The Serpent Rings' album cover, my wife Sarah took some shots along the way. There's not that many photos here (considering the weeks it took to complete), but from what we've got I am able to share with you the development process . . .
As always I begin with a pencil drawing on tracing paper. In the case of a commissioned piece it will have been approved by the customer, in this instance (see below left), Tony Clarkin of Magnum, who was pleased to see his concept come to life. I begin by positioning the pencil drawing on a sheet of HP watercolour art board. Using Saral Graphite Transfer Paper and a 6H pencil, I trace down the main lines of the image (see below right):

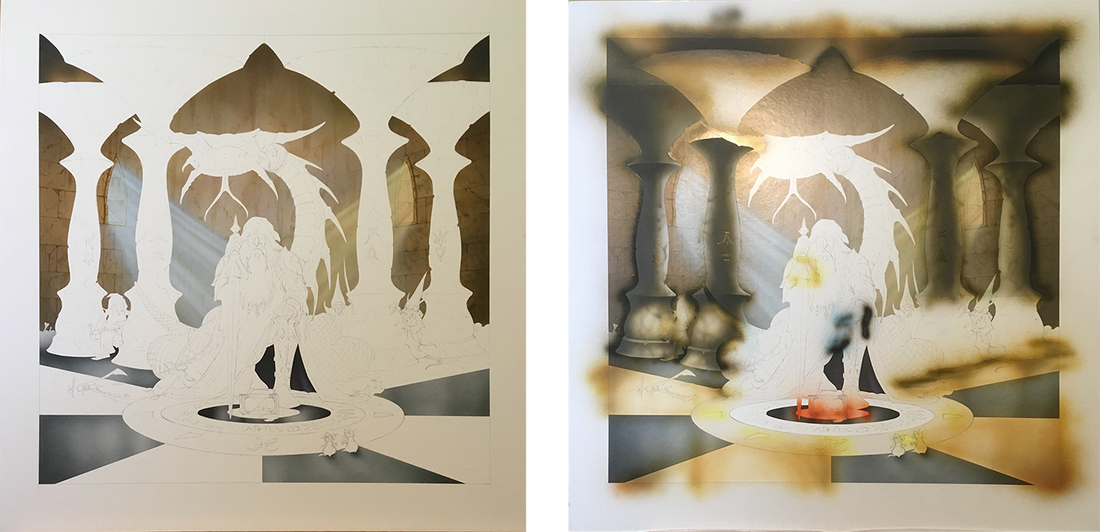
The next stage involves covering the whole art board with low tack transparent masking film. Using a sharp scalpel, I cut around various areas, removing sections of film (see below left) in preparation for airbrushing with my DeVilbiss Super 63. As you can see, (below right) I begin to spray in some background areas:

I spray in another colour and then set to work hand-painting the walls and windows (see below left) using a sable-haired brush (numbers 2 or 3). My medium for both airbrush and hand-painting is pigmented ink, thinned with methylated spirits. I then return to the airbrush - here I spray in the shafts of light from the windows (see below right):

I peel off the entire area of masking film and then repeat the whole masking film process again - covering the entire art board once more - and I cut out different areas to be sprayed (see below left). I spray some more - the pillars and floor area this time (see below right):

I am almost at the end of the masking and airbrushing stages, but there are just a few things that I still need to do prior to commencing hand-paintings, i.e. the tops of the pillars and the body of the snake. I begin hand-painting the background characters and features on the floor:

I continue to hand-paint until I am able to reach the point of airbrushing the body of the snake:

Hand-painting continues in earnest. I now concentrate on the principal character - the Storyteller/warrior and his sword:

I set to work on the cloak and armour, leaving his face until last:

Finally, I paint-in surface detail on the floor and other foreground items, such as the mice (see below left). One of the more pleasureable moments, is the removal of the masking film upon the border, revealing a nice, crisp, edge. The finished artwork is then scanned, so that we have a high-resolution image on file. In this instance (see below right) a little more work is required; as record cover art, the band's logo and album title must also be set on the image. Sarah and I work on this together, choosing colours, typography, size and placement.

And here it is in motion:

6 comments
Think this is one of your finest pieces sir and thats saying something,be well………………………………..